
In my last blog post, we talked about how to create a brand Instagram story template in Photoshop (and I included a free template - did you download it yet?).
Did you know that you can highlight your Instagram stories to the top of your profile so that your followers can see them again and again? As we know, stories keep your content at the top of your followers’ minds and using them helps boost your reach and engagement (win-win!).
The best way to do this is to categorize your stories into those little circles just below your profile description (highlights). Whether it’s videos of your awesome face, a tutorial series, or simply showing people what products you sell, categorizing these highlights can allow people to quickly refer back to that story and allows you to show them exactly what they’re looking for from you.
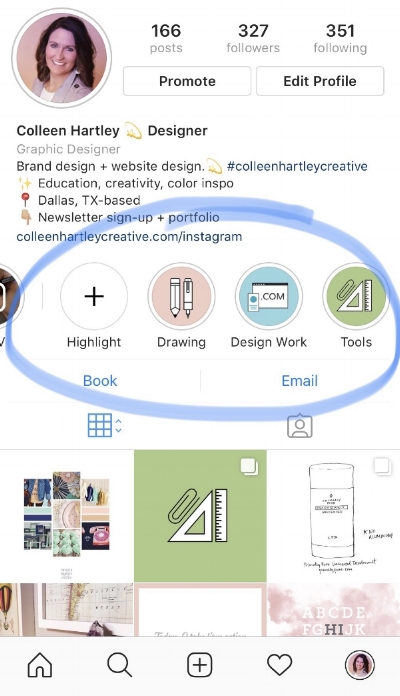
Here are a handful of examples of highlights you could add to your profile: about me, behind the scenes, a client profile, new products, or a day in the life. You can add more to each highlight at any time.
What I want to show you today is how to create a cover image for those story categories that are on brand and make your profile look organized.
Why Your Brand Needs Story Highlights
The stories you create are automatically archived after 24 hours (only you will be able to access them from the archive section on your profile). If you highlight the ones you worked so hard to create & customize, it saves them at the top of your profile so all the visitors to your Instagram account can see them at any time.
Your followers are likely watching your stories, and stories are a great tool to remind followers of what you are up to and direct more traffic back to your stand-alone posts on your grid. They can watch these highlights over and over!
Customizing your own story highlight covers is a great way to convey the strength of your brand. By using your own brand identity fonts, colors, and patterns you can show yet another extension of how you show up in a consistent way.
How to Create Your Own Instagram Story Highlight Cover Template
Creating your own highlight cover template doesn’t have to be frustrating! Here is a simple, step-by-step breakdown on how to create a simple but unique Instagram stories template in Photoshop.
As mentioned in this post, Photoshop is the quickest way to make this happen.
You can create ONE layered file and then simply change what you need at any given time, and then save separate flattened files to pop into your feed as you wish!
Today I'm going to show you one of the easiest ways to make your custom template.
But first, remember. Do not be intimidated by Photoshop!
Note: All directions shown below are in Adobe Photoshop CC 2017. Need to get a free Photoshop trial? Click here to get the details.
Your Step-by-Step Breakdown for Creating Instagram Story Highlight Covers:
Create a new document:
Click on File > New
Set Preset Details
Width: 1600 pixels
Height: 2844 pixels
Resolution: 100 Pixels/Inch
Color Mode: RGB
Background Contents: White

Set your background:
Remember, what you always see is top to bottom & front to back. Unlock the background layer by opening your Layers palette and double-clicking the layer labeled ‘Background’ with the lock too. Double clicking it will unlock it. Be sure the settings are adjusted to those below:
Color: None
Mode: Normal
Opacity: 100%

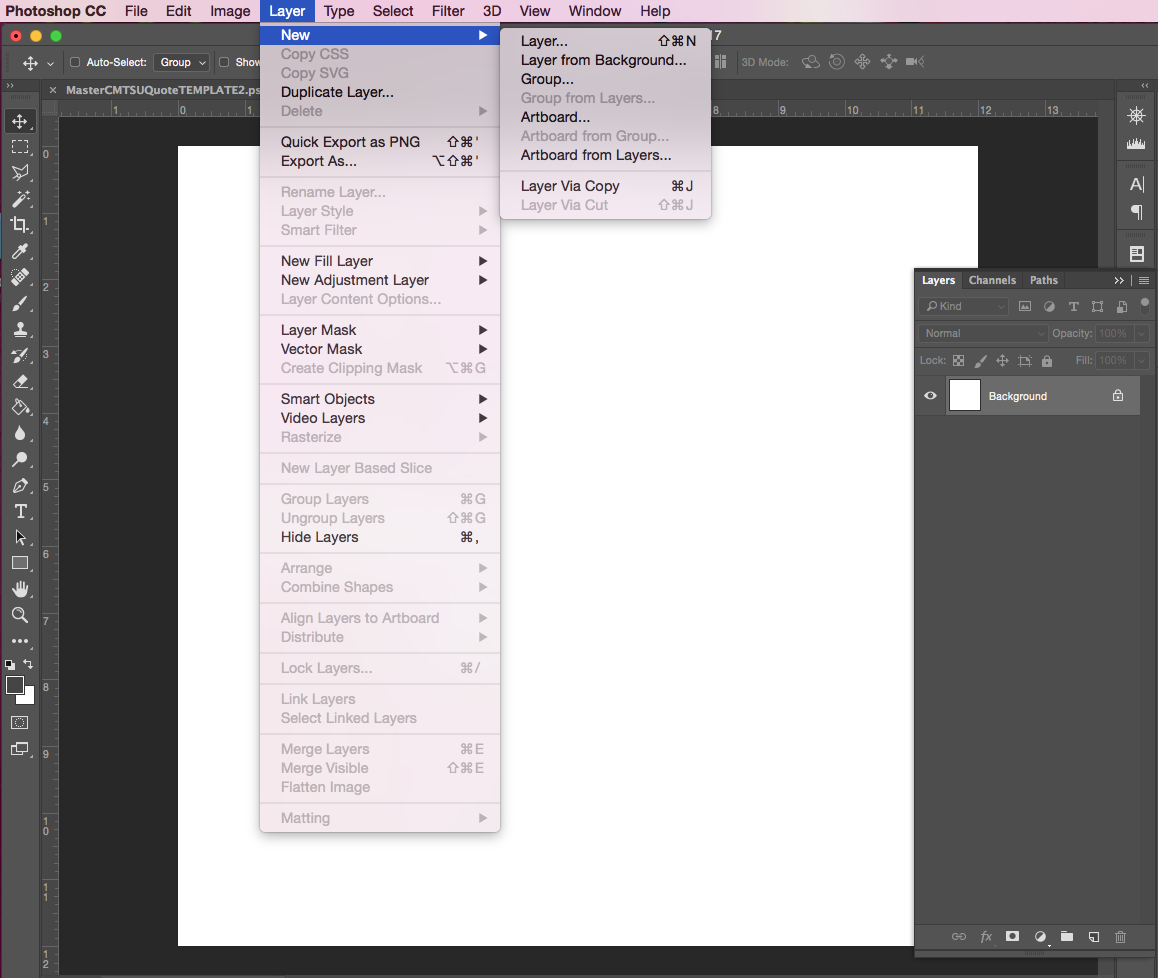
Create your layers:
Click on Layer > New Layer.
Then, name this layer (Could be Image or Solid background or just Layer 1). Be sure the settings are adjusted to those below:
Color: None
Mode: Normal
Opacity: 100%
Use the paint bucket tool to set your colors:
Click the Set Foreground Color box to get the colors to pop up. Choose a color from your brand identity color palette. Click OK.


Click on the Paint Bucket Tool in the tools on the left.

With your New Background Layer selected, click in the middle of your document to place in the color. You can use a solid color, insert a photo or even use text.
Be sure to SAVE often!
Click File > Save, and save the original file as a .psd file.
Content
I’ve seen a lot of different iterations of what to put as the image in that tiny circle. My favorite ones are those that use an icon, flat color, pattern, or even a letter (pull these from your brand identity style guide!) as the full image.
Placement
It’s best to keep the main cover image content in the center area of the document. You can crop it to the circle when you save it to the Story Highlight Cover.
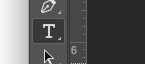
To add wording, use the text tool.
Click on the Horizontal Type Tool in the tools on the left. Click in the middle of your document or where you want the words to go. It automatically creates a new Type Layer. Don’t forget to use your brand identity fonts!
Double-Click the Set Foreground Color box again to get the colors to pop up.
Choose a color from your brand identity color palette (or black or white or choose a contrasting color from your brand identity color palette). Click OK.

Begin typing your words.
Select your text and adjust the font, style, size, paragraph orientation, etc in the toolbar along the top.

Now, add your logo or any other image.
Open your logo file in Photoshop. Have both the template and the Logo file next to each other in separate files. With the Move Tool selected, select the layer that the logo is on and physically drag it onto your Instagram image. The logo is now it's own layer in your layered Instagram template Photoshop file.Save your file for Instagram.
Save the original layered file as .psd file, then save it in a location you can remember! Toggle the layers on or off in your Layers palette that you do not want to be seen in the final artwork. Do this by clicking the small eyeball tool to the left of each layer in your Layers palette.

To Save Option 1:
Click File > Export > Save for Web.
Select the following details in the Save for Web screen:
- PNG-8
- Check Transparency
- Check convert to sRGB
- Image size: 1600 x 2844 px
- Quality: BicubicClick Save. Then save to a specific folder to add to social. Save in a location where you can access it on your phone. (Google Drive, Dropbox, etc.)
- Navigate to image on your phone. Save it to Photos on your phone.
- Then upload to Instagram!
OR
To Save Option 2:
To export as a .png, click File > Export > Quick Export as .png.
Be sure to edit or hide layers as needed. Tip: Include the month and/or day in the file name. Then save to a specific folder to add to social. Save in a location where you can access it on your phone.Finally, click File > Save the template with your new art in the layered .psd file!
Need help with file types? Learn more about the fundamentals of Photoshop here! Or, download this simple cheat sheet I made all about different file types that apply to Photoshop!
To Place Your Image on IG Stories as a Highlight Cover:
Let’s pop it onto Instagram now...
Navigate to image on your phone (from Google Drive, Dropbox, etc). Save it or export it to your phone
Upload to Instagram Stories!
Go look at your own stories and click the little circle heart button at the bottom right of the screen.

Then add it to one of your Highlights or click the ‘+’ to create a New Highlight.
You now have it saved to your Story Highlights!
Now, click on the Story Highlight just under your Instagram profile paragraph.
Click on the three dots in the bottom right corner.
Select ‘Edit Highlight’
Select ‘Edit Cover’
Now choose the Highlight Cover image you just created and added to your Story Highlights. (There will be a circle crop area to place your image or icon or words within.)
Hooray! It is now set as the Highlight Cover image!
Don't want to make your own IG Story Highlight Cover template?
I've created and easy-to-edit one for you! You can use the above instructions to pop in your custom images and brand fonts, make edits and save as needed.